Even though the official Z-Image ComfyUI workflows are designed mainly for text-to-image, they can be easily modified to support image-to-image (i2i) generation.
Below you’ll find a simple, step-by-step method to adapt your existing Z-Image workflow and start generating images based on an input image.
How to Enable Image to Image (i2i) in Z-Image
- Double-click on an empty area of the workflow background and add the “Load Image” node. Inside this node, drag and drop the image you want to use as input.
- Double-click again on the workflow background and add the “VAE Encode” node.
- Connect the Load Image node to the VAE Encode node using the blue connector (from IMAGE to pixels).
- Connect the Load VAE node to the VAE Encode node using the red connector (from VAE to vae).
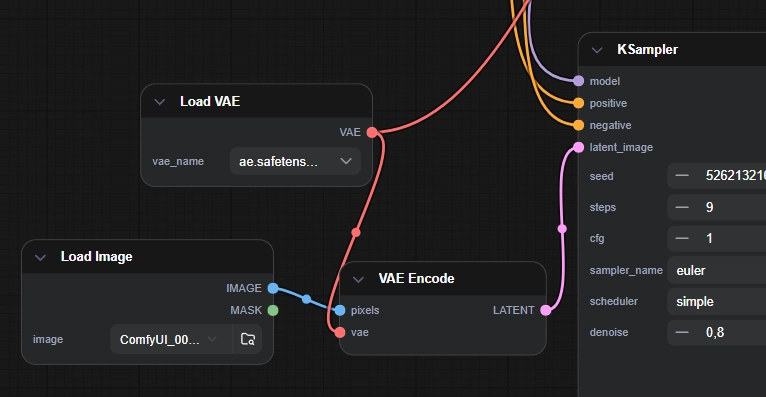
- Connect the purple LATENT output of the VAE Encode node to the latent_image input of the KSampler.
- In the KSampler node, change the denoise value (the last parameter) to a value lower than 1 (for example, 0.7). If you leave this value at 1, the workflow will behave like text-to-image and image-to-image will not work correctly.
That’s it. Your workflow is now correctly configured for image-to-image generation with Z-Image Turbo.
This is a very practical solution while we wait for the official Z-Image Edit model to be released.
Keep in mind that to control how the input image changes, you still need to use the Prompt node. The prompt tells the model what to modify, enhance, or preserve in the original image.